Showing posts with label art fundraiser. Show all posts

Tuesday, October 13, 2015

In the Art Room: Houses to Help, a Compassionate Fundrasier

I think that teaching compassion and kindness is one of the most important and most difficult things to do. I mean, you can remind the kids to be kind, considerate and thoughtful until you're blue in the face but until you actually show 'em how and let them know the positive effects, it's almost impossible. 

Recently, the kids in my room were talking about an apartment fire that had happened the night before. Thankfully no one was hurt but many of my students were aware of the incident because it happened in their complex. One of our families was effected and lost much due to the fire. 

While the kids were talking about it, I thought it would be a good time to do a compassionate fundraiser with the kids. I try to do one every year where artwork is "sold" to parents at a price they chose to give and the money going toward a specific cause. One year, we did the Empty Bowls thing and raised close to $2000 for a local homeless shelter. Another year, we sold our animal clay sculptures with the proceeds going toward a local humane society. These have always been a success however...there was always a disconnect. The children never visited the humane society or the shelter. They never actually witnessed the positive effects of their efforts nor did they have a connection to the shelter or the humane society. 
And that's when I got the idea for my third and fourth grade students to help the family effected by the fire. They have both a connection with the family and the apartment. When I brought the idea up to the kids, you could have heard a pin drop. They were so excited that they might be able to use their art to help a family, that they knew, in need. 
The idea for these houses was not my own. You might recall the Houses for Haiti effort from several years ago. We used the same concept. I chopped up scrap painted papers into 2" X 2" squares. The kids were to pick any two squares, one for the house, the other for the roof. Rotating one square to a diamond, folding in half and cutting along the line, they had a triangle roof. From there, they were allowed to use scrap papers, glue, Sharpie markers and paint to decorate their houses. They had free range and were told they could make as many as they liked in the 15 minutes we had remaining in the class period. Most kids created one but I had several that were in it to win it and were busting 'em out factory style. "I want to make a bunch to raise a bunch of money," I was informed by one fourth grade girl. 
Once complete, I hot glued a 2" X 2" piece of card stock to the back of the house as well as a magnet. For some reason, I have a trove of magnets in that pit I call a storage closet. Which means this craft was free to make, yay!
I created a little tag to go along with the houses. We put them up for "sale" in the teacher's lounge with a suggest price of $1 after much price bickering by the kids. I left my signs, the houses and a box for money in the lounge that I checked at the end of everyday. I don't think a single person paid a dollar based on how much money we raised. 
 The houses were just irresistible! 
 The artist behind this house is usually one of my first-finishers...but not this time. He was dedicated to crafting a detailed and unique house that was sure to sell.
 I love the stained glass look of this one.
To know the impact their art made, I left this in the lounge so that the teachers could write notes to the kids. This meant so much to the young artists. 
Have I told you lately how much I love the people I work with? Talk about kind and considerate!
In addition to this effort, my school also hosted a spirit night at a local restaurant to raise funds. Our magnets raised just over $150 for the family. Oh! And I also shared an image of this project on Facebook and received a half dozen letters in the mail with money for magnets as well! If you are interested in purchasing a magnet, just leave a message in the comments and I'll be sure to get in touch with you. Thank you!

 photo signature_zpsd10b3273.png
Read more »

Wednesday, April 17, 2013

In the Art Room: Pinch Pot Pets

Every time I go into the kiln room and see these little guys staring at me from the shelves, I feel like singing: I always feel like...Somebody's watching me. And I have no privacy, Whooooa, oh-oh (go get you some Rockwell here and be prepared to get your paranoid on).
Greetings from the land of Pinch Pot Pets! Last week my younger students completed glazing their clay animals (my older students are still painstakingly working on every minute detail of theirs) and I'm excited about the results. Our theme for this year's clay projects were cats and dogs as our students will be "selling" their work back to their parents for a donation to the local humane society. We're do-gooders like that. The kids love clay and really enjoyed this project. But I'm rambling. Check out this cuteness:
Aw! This looks like a certain orange cat that lives in my house! I wonder if this one plants herself on the table at dinnertime as well.
"Hmmm? Did someone say snack?!" I love the added detail of the collar and hair bow by this first grade student.
So just how did my wee ones complete these clay projects in half an hour art classes, you ask? Well, it wasn't easy. But I've found that breaking the clay construction up into two days helps. And having several parent volunteers on hand. Mostly to keep me in line.

In preparation, here's what's on each table:
  • a clay mat for each child, purchased from The Clay Lady
  • 2 cups of water and 2 toothbrushes
  • 4 skewer sticks
  • 1 piece of clay the size of a small orange per student
Other preparation included:
  • One labeled ziplock bag per student
  • a damp paper towel per student
 For the demonstration, I have the students gather around a table and I show them the steps to creating a pinch pot. Here's what I tell 'em:
  • Roll your clay into a sphere and place it into the palm of your hand.
  • Using your other hand, put your thumb on the top of the sphere and wrap your fingers around the back.
  • Sink your thumb so deep into the clay that it looks like your thumb is wearing a clay afro. But don't go too deep and have your thumb pop out the other end because then you'll end up with a donut. And nobody likes clay donuts.
  • That part they can do no problem. Thumb afros, they got that. It's the pinching-into-a-pot part that some struggle with. I ask them to imagine they are holding a cookie and show me what that would look like. They all hold up their fingers about 1/2" apart. I tell them that their clay should have that same thickness. And then we eat the imaginary cookie with a loud "crunch!" and "mmm!" before proceeding.

  • After showing them a couple of non-examples of pots that are too thick or thin, I show them what a correctly pinched pot should look like. 
  • At this point, the demo is over. I show the kids how to wrap their pot gently in a damp paper towel and place it carefully into the ziplock bag. They are not to seal the bag closed as trapped air inside will dry out the clay. Instead we simply tuck the bag underneath the pot. Like this, their project will stay damp for up to a week. But it might begin to smell a bit if kept longer.
  • The following art class, I tell the kids that they may either create a dog or a cat. I introduce them to the idea that you can make anything out of clay with three things: a sphere, a slab and/or a coil. To illustrate that, I begin by using spheres for the eyes. 
  • Note: all pieces of clay must be attached by using the toothbrush and cup of water. I tell the kids, if you don't brush your teeth, your teeth fall out. If you don't brush your clay, your parts will fall off. It kinda works.
  • I demonstrate using the stick to add the pupils and eyelashes.
  • A sphere pinched into a triangle is used for the nose.
  • Coils for the mouth and skewer-drawn whiskers.
  • I tell the kids that the parts of a face for a dog and cat are about the same. It's the ears that make the difference. Using a slab, or flattened piece of clay, the kids can create dog ears. Cat ears can be created by cutting the slab into a triangle shape.
  • Some finished theirs off with a coil for a tail. 
  • And that concludes the second day of Pinch Pot Pets! As the students finish, the volunteers and I wrote their names and teacher codes on the inside of the pot. Then I set them out over Spring Break to dry completely.
After Spring Break and many firings, their bisque-fired clay animals were ready for glaze. I like to use Mayco's Stroke and Coat. I gave the kids every color in the rainbow (which many saw as an opportunity to go hog wild) and told them my two glazing rules: don't glaze the bottom as the glaze will cause the project to stick to the kiln shelf; don't layer 15 different colors of glaze on top of each other. Because it will look like a rainbow exploded in a really bad way. However, if you want color, do it with patterns.
And suddenly I feel like I'm in San Francisco all over again. Super psychedelic, dude.
These two crack me up. The Eye-Popper-Outter and the Cheshire Cat.

Stripes and spots were a pretty big hit.

And there you have it! Pinch Pot Pets. If you'd like to see what my students created last year out of clay, you can visit here. Be on the look out for more clay posts within the next couple weeks as the kiln just keeps spittin' out these awesome little masterpieces. Until then, enjoy the rest of your week!


Read more »

Monday, March 18, 2013

In the Artroom: An Easy Fundraiser

Greetings, ya'll! I'm here to share with you a fingerprintin' fundraiser that brought in the big bucks for our school. This project was a trifecta of perfect: cute, money-making and, most important of all, it didn't interrupt my art classes in the least. I can't recommend this enough if you are in need of funds and, really, who isn't?
Finger-printin' good. I love these little astronauts.

An art teacher buddy of mine had the idea of doing this at her school earlier this school year. Together we visited a local ceramics shop in our town which sells pieces like these in the price range of $8 to $12. When she told me what a big success she'd had, I knew we had to give it a go at my school.

Now this fundraising venture would not have been at all possible without the help of my art room parents. These moms (and a coupla dads!) are seemingly on call whenever I need help with a big project: hanging our school-wide art show, washing all the t-shirts for tie-dying, helping students create a masterpiece out of clay -- when I need them, they are always there.
How did I get so lucky, you might ask? Especially when, as the lone art teacher, I'm prone to just goin' it alone. Well, it all started at one of our monthly meetings between our teachers, administrators and PTO. I remember it like it was yesterday (cue harp music and foggy fade out)...I made this radical suggestion that we tie-dye our school's normally white fun run t-shirts (yet another fundraiser). When the PTO prez piped up and said she'd be glad to help, she did way more than that. She researched and ordered the supplies, arranged for at least two to four parents to be in the room and help the kids when needed. Not only that but they rinsed, unbanded, washed and dried all 400 shirts! I know, they're awesome.

So when the idea of a fundraiser came up earlier this year, I decided to copy my art teacher buddy and purchase with school funds a ceramic piece for each class at our school (around 25). Our PTO prez sent out an email blast to the parents asking for just a couple of volunteers. Because this was to be a simple finger printing project, not too many parents were going to be needed.
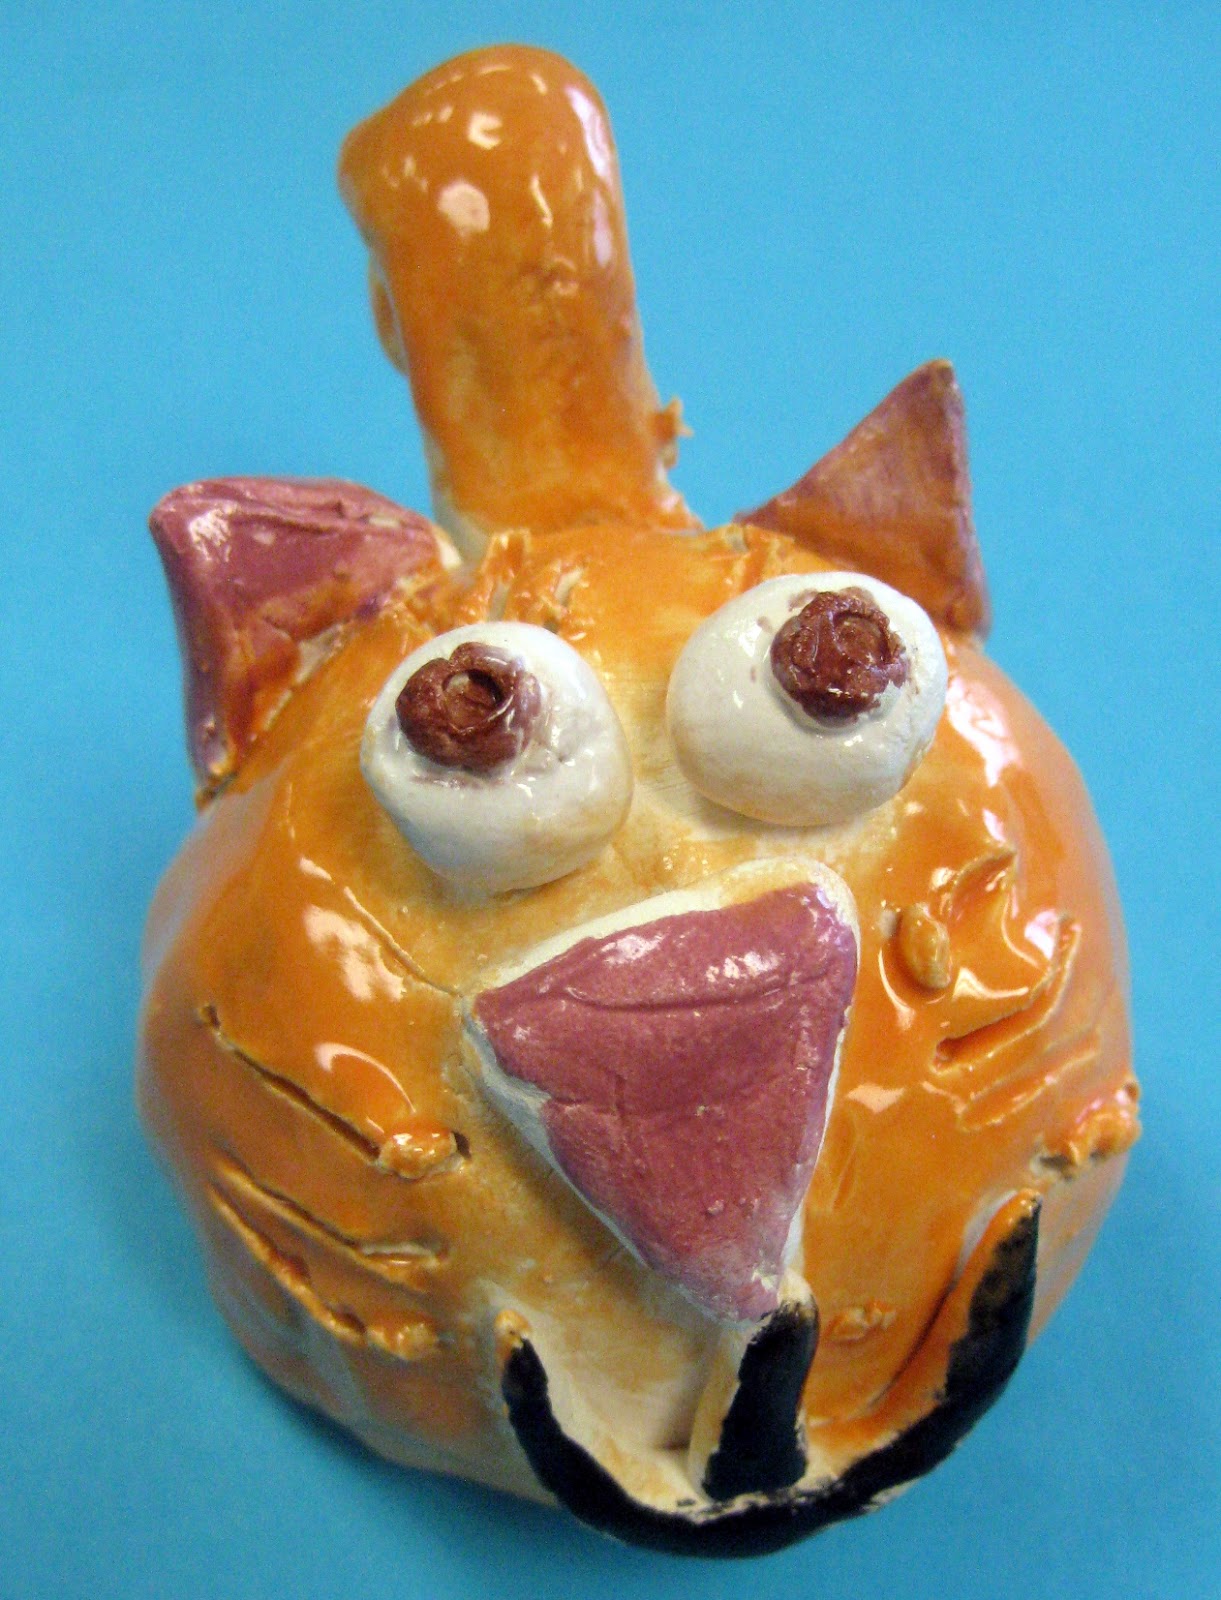
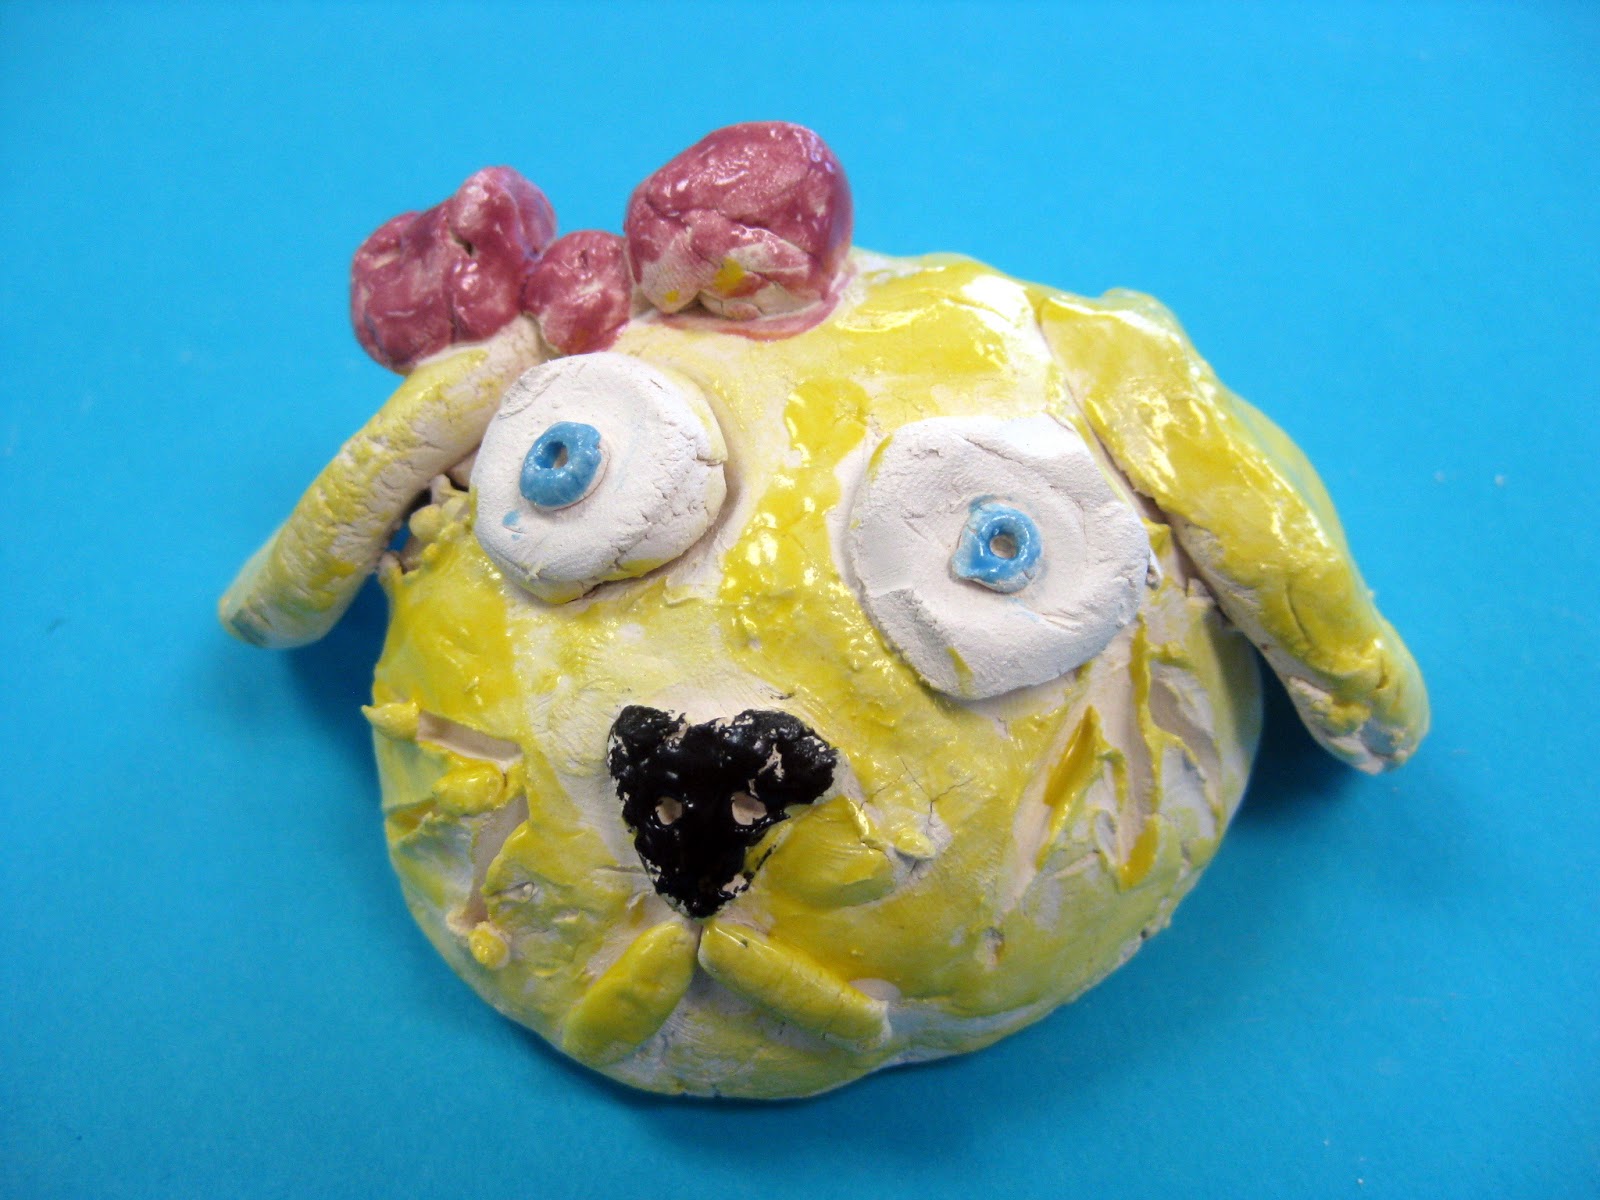
My job was to come up with 25 different ideas for the platters, cookie jars and popcorn bowls. If the teachers had a classroom theme, then I went with that as the idea for their piece. However, some did not. So I scoured pinterest for fingerprinting ideas and came up with what you see here. Please feel free to steal these ideas as they're stolen goods anyway.
Here are the supplies we used for this fundraiser: 
  • Pre-fired ceramic pieces (aka bisqueware). You'll want to find an inexpensive resource for this. I was fortunate to have a place just a block from my school.
  • Mayco's Stroke and Coat Glaze. 
  • Clear glaze
  • Fingers. Lots of teeny tiny fingers.


Now the beauty of this project was that it didn't interrupt my lessons in the least. I simply cleared a table for the moms and went about my lesson. As the kids were working, they'd call each over to add their finger print and that was it. All of the detail work that you see, including that amazing zebra pattern painting, was done by these marvelous moms.
Okay, now you might be thinking: wait a minute, the kids had no hand in the painting part? Nope. Nada. Zero. Zip. Dislike that if you wanna, but this was a crunch time fundraiser. Besides, the kids were in the middle of their own painting, weaving and/or collaging projects.
After the students printed their fingers, the parents went about the detail work. Often times, they would draw out their ideas in pencil and paint over that in glaze. The pencil lines fire off in the kiln. Once the details were painted, two to three coats of clear glaze were applied to the pieces.
Sadly, adding the clear coat last caused a little bit of smearing of the colorful glaze. After noticing this, one mom suggested applying the clear glaze first and then go about the finger printing and detail work. So smart. Did I mention they also know how to load and unload my kiln? I know, I'm spoiled rotten.

So just how much did we raise? Well, like I said, each piece cost between $8-12. The glaze used was about $60. That added together is roughly $300. The pieces were placed at a silent auction with the highest bid of the night being $70. In total we raised close to $1000 with our profit being about $700. Not to shabby. Most definitely a fundraiser we plan to do again.
Read more »